Does your dog hate getting their nails trimmed? Haley’s never liked having hers trimmed and as she got older it became a real struggle. Literally! It was getting so stressful for both of us that I felt it was time to try a new approach. Did you know that you can ditch those old clippers and use a Dremel® tool to trim your dog’s toenails?
At first, I was a little nervous about firing up an electric grinder and having a go at Haley’s nails and I didn’t envision Haley being too thrilled about the idea either. Luckily, I discovered these two videos that helped explain the process.
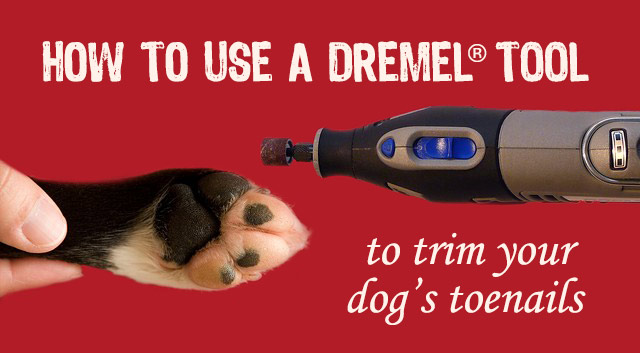
How to Use a Dremel Tool to Trim Your Dog’s Toenails
Barbara and Dr. Matheson did a great job of explaining how to trim nails, but I want to focus on how to get your pup to that point where they are relaxed and comfortable with a Dremel pedicure. It’s important to use positive reinforcement to condition a dog to the tool and it’s especially important for dogs like Haley that are already stressed about their nails being trimmed. Here’s my step-by-step approach.
Conditioning Your Dog to Be Comfortable with the Dremel Tool
Step One – Get Your Dremel Tool Ready
I purchased the Dremel 8220 model because it’s rechargeable and easy to handle. It also has a nice variable speed range, rather than just a low and high setting. Install the sanding drum accessory, then slide a coarse sanding band onto the drum. Make sure the tool is fully charged. Note: Never use any solid grinding stone or grinding wheel accessories as they generate too much heat.
Step Two – Get Yummy Treats
I like to use real food that both Haley and I can eat, like cooked chicken or ham. Break whatever food your dog loves into little pieces and put them in a small bowl.
Step Three – Build Anticipation
Dogs always want what we have, so I create the illusion that the food is for me. I take the Dremel tool and food into another room so Haley has to follow me, rather than me approaching her with the tool. It helps to build some excitement because she’s pursuing something she wants and is more likely to want to participate in the conditioning.
Step Four – Give Your Dog Treats While Conditioning
Take a bite of the food yourself (now you see why I use real food, haha!) then turn on the Dremel tool. Practice giving your dog food while the tool is running, then stop the treats when it’s turned off. You’re conditioning your dog to associate good things with the sound of the Dremel.
Build on Your Dog’s Success!
After your pup is comfortable with the sound of the Dremel tool and comes running when you turn it on, you’re ready to begin replacing Step Four with the conditioning levels below. Work through each level at your dog’s own pace and only proceed to the next level when they’re comfortable with the current level. Each session should be fairly short and a positive experience with lots of treats and praise.
Have your dog give you her paw while the Dremel tool is running. Treat each time she gives you her paw.
Ask for your dog’s paw then practice moving the running tool close to her paw and then away. Give her a treat each time she allows you to place it near her paw, working closer each time but at a pace she’s comfortable with. Practice on different feet.
While holding your dog’s paw and stabilizing a nail, touch the Dremel tool to the nail for just a moment, then set it aside (while still running) and give your dog a treat. If your dog is startled by the touch, end the session and practice again later with just one touch again. Haley was extra sensitive at this stage. When she seemed resistant, I would touch the Dremel tool to one of my fingernails then eat some food. Yep, a little psychological warfare did the trick. She felt like she was missing out on getting the treats and would give in and cooperate.
Work on touching two or three different nails for just a moment then give a treat. Practice rotating on all four paws.
Now you’ll begin actually grinding away some of the nail material as you increase the amount of time and pressure spent on each nail. Remove just a little bit of each nail before giving a treat and moving on to the next one. End the session when your dog seems to need a break.
Work towards grinding each nail on each paw while still giving lots of treats for your pup’s cooperation. Hopefully, by this time, your dog will be much more relaxed but it’s always nice to work in an occasional belly rub to make the trimming sessions more enjoyable for your dog.
Continue working with your dog until you can grind all of her nails in one session while slowly decreasing the number of treats.
Here, Laurie Luck demonstrates what a positive nail trimming session looks like.
It takes some patience and lots of treats at first, but if you take a few minutes each day, you can work through the levels pretty quickly. I’m so glad I decided to give the Dremel tool a try with Haley. It’s actually fun working on her nails now. Instead of stressing out when she would see those old nail trimmers, she now comes running every time she hears the sound of the Dremel tool. Success!👍
If you want to start using a Dremel tool to trim your dog’s toenails, be sure to watch the videos first and check with a local groomer if you need any additional help. Now it’s your turn to share your nail trimming tips with us in the comment section below!
Wonderful suggestions. Both my parents’ dogs had their nails trimmed by a Dremel. Beau has light nails, which are easy and I may try with him. I am more hesitant to do Gonzo’s nails myself because his are pitch black and I don’t want to hit the quick.
Hi, Heather! Haley has a few black nails too and I was always worried about those when using the trimmers. Here’s a great video that explains in detail about how to find and avoid the quick when using a Dremel tool.
I love the grinding tool! I’ve used it with the pug for years, and just recently, even risk-averse Sinead started letting me use it on her feet. My only additional tip, based on my experience, is to start with the jolly dog first (if you have two). Once Sinead saw that Liam didn’t get hurt with the tool, her anxiety level went way down.
That’s a great tip. Thanks, Jean! That’s kind of what I was trying to do by using it on my own fingernail, but I think dogs learn from or trust other dogs quicker than us. They observe so much from each other, don’t they?
I have always wondered about using one of these. Ruby is OK getting her nails trimmed but I don’t like doing it. She has black nails and it makes me nervous trimming them.
I should try a dremel tool. First I have to trim the fur on my cocker’s legs and paws – a huge chore in itself, since both of them hate having their legs and paws shaved. Then when I can finally see their nails, I usually have to flip them on their backs and sit on them so that I can trim their nails with a clipper. It’s stressful for both of us, but at least it doesn’t take long.
Hi Sandy! It sounds like you got a great system there since you can do the trimming part quickly. If you ever decide to try the Dremel tool, the cordless types would probably be better for your Cocker Spaniels, since they have an auto-stop safety feature in case their hair would be caught. I just love their coats, so beautiful!💗
Great post! I’ve been meaning to put together a blog post about trimming doggy toenails. I’ve used several different pet brand dog trimmers including the Dremel 7300 pet grooming tool, but all were insufficient. I just finished researching higher power Dremels and I was just about to order the 8220. Seeing that you purchased a Dremel 8220 seals the deal for me! Do you have any complaints or concerns about your Dremel?
I put off trying the whole Dremel method for a while because there didn’t seem to be a perfect Dremel model out there, but I finally gave in and ordered the 8220 because it seemed like the best option. It’s been great so far and holds a charge for a long time. Some people complained about the charging unit not working well, but I haven’t had a problem with mine.
I really like having the variable speed range slider, since sometimes you need just a little more (or a little less) power. I’ve only used this for Haley’s nails, since we have a corded Dremel for other heavy duty jobs, but the unit seems well made and it would probably perform well for almost any job. I’ve been using it now for about 9 months and no regrets or problems!👍
I like the step by step, slow approach you took to get Haley used to the Dremel tool. I actually just got to the point where I can trim Phoebe’s nails myself with a clipper, but for Icy I’d rather use a Dremel type tool. Great information, thanks for sharing!
Love & Biscuits,
Dogs Luv Us and We Luv Them
Thanks, Cathy!😊 It took a little while to accomplish, but it’s so nice now when it’s time to shorten Haley’s nails. I’m glad you’re making great progress with Phoebe’s nails and she doesn’t mind the clippers too much. I like how you’ve discovered what works best for both Phoebe and Icy.👍
It’s working great for Haley and the charge lasts a pretty long time in case you’re out at sea. Of course, the regular type of trimmers would take up less room on the boat though.
Great article on trimming dog nails using a Dremel. We have used this method for over 20 years and find it is much easier than the tools they sell for this purpose.
I’ve recently learned about the dangers of the dremel making the nail too hot where it hurts the dog, and that you should only do it for a second or two at a time. Another concern=/
Browse around awhile and you’ll find lots of helpful training tips and information along with some news, product reviews and yes, even a few dog tales! I would love to hear your thoughts, so leave a comment, suggestion or start a conversation. This site is devoted to the community of dog lovers, dog owners and most of all, our four-legged family members who give us their unconditional love.
 Does your dog hate getting their nails trimmed? Haley’s never liked having hers trimmed and as she got older it became a real struggle. Literally! It was getting so stressful for both of us that I felt it was time to try a new approach. Did you know that you can ditch those old clippers and use a Dremel® tool to trim your dog’s toenails?
I start my puppies out with the dreamel then they like it as adults. Great post!
That’s so smart! I wish I would have done it when Haley was a puppy or tried it long before nail trimming became such a problem.
Wonderful suggestions. Both my parents’ dogs had their nails trimmed by a Dremel. Beau has light nails, which are easy and I may try with him. I am more hesitant to do Gonzo’s nails myself because his are pitch black and I don’t want to hit the quick.
Hi, Heather! Haley has a few black nails too and I was always worried about those when using the trimmers. Here’s a great video that explains in detail about how to find and avoid the quick when using a Dremel tool.
https://www.youtube.com/watch?v=JsnkEI1V3bM
I love the grinding tool! I’ve used it with the pug for years, and just recently, even risk-averse Sinead started letting me use it on her feet. My only additional tip, based on my experience, is to start with the jolly dog first (if you have two). Once Sinead saw that Liam didn’t get hurt with the tool, her anxiety level went way down.
Jean from Welcome to the Menagerie
That’s a great tip. Thanks, Jean! That’s kind of what I was trying to do by using it on my own fingernail, but I think dogs learn from or trust other dogs quicker than us. They observe so much from each other, don’t they?
I have always wondered about using one of these. Ruby is OK getting her nails trimmed but I don’t like doing it. She has black nails and it makes me nervous trimming them.
Those black nails make he nervous too. If you ever want to give the Dremel a try on Ruby’s nails, here a video that might be helpful.
https://www.youtube.com/watch?v=JsnkEI1V3bM
I should try a dremel tool. First I have to trim the fur on my cocker’s legs and paws – a huge chore in itself, since both of them hate having their legs and paws shaved. Then when I can finally see their nails, I usually have to flip them on their backs and sit on them so that I can trim their nails with a clipper. It’s stressful for both of us, but at least it doesn’t take long.
Hi Sandy! It sounds like you got a great system there since you can do the trimming part quickly. If you ever decide to try the Dremel tool, the cordless types would probably be better for your Cocker Spaniels, since they have an auto-stop safety feature in case their hair would be caught. I just love their coats, so beautiful!💗
Great post! I’ve been meaning to put together a blog post about trimming doggy toenails. I’ve used several different pet brand dog trimmers including the Dremel 7300 pet grooming tool, but all were insufficient. I just finished researching higher power Dremels and I was just about to order the 8220. Seeing that you purchased a Dremel 8220 seals the deal for me! Do you have any complaints or concerns about your Dremel?
Thanks, Colby!
I put off trying the whole Dremel method for a while because there didn’t seem to be a perfect Dremel model out there, but I finally gave in and ordered the 8220 because it seemed like the best option. It’s been great so far and holds a charge for a long time. Some people complained about the charging unit not working well, but I haven’t had a problem with mine.
I really like having the variable speed range slider, since sometimes you need just a little more (or a little less) power. I’ve only used this for Haley’s nails, since we have a corded Dremel for other heavy duty jobs, but the unit seems well made and it would probably perform well for almost any job. I’ve been using it now for about 9 months and no regrets or problems!👍
I like the step by step, slow approach you took to get Haley used to the Dremel tool. I actually just got to the point where I can trim Phoebe’s nails myself with a clipper, but for Icy I’d rather use a Dremel type tool. Great information, thanks for sharing!
Love & Biscuits,
Dogs Luv Us and We Luv Them
Thanks, Cathy!😊 It took a little while to accomplish, but it’s so nice now when it’s time to shorten Haley’s nails. I’m glad you’re making great progress with Phoebe’s nails and she doesn’t mind the clippers too much. I like how you’ve discovered what works best for both Phoebe and Icy.👍
I’m ashamed to admit I’ve let Honey’s nails get far too long. I dread hitting the quick.
I wonder if I should start with the dremel. I’d be far less likely to overdo it.
It’s working great for Haley and the charge lasts a pretty long time in case you’re out at sea. Of course, the regular type of trimmers would take up less room on the boat though.
Is it safe if my owner use a normal nail clipper? They want to know!!!
Hi Zoe! I would double-check with your vet or groomer about using human-type nail clippers. The type made specifically for dogs tend to work best.🙂
Great article on trimming dog nails using a Dremel. We have used this method for over 20 years and find it is much easier than the tools they sell for this purpose.
when the dremel is on my dog starts barking should I still give him a treat ? thank you for sharing
I’ve recently learned about the dangers of the dremel making the nail too hot where it hurts the dog, and that you should only do it for a second or two at a time. Another concern=/